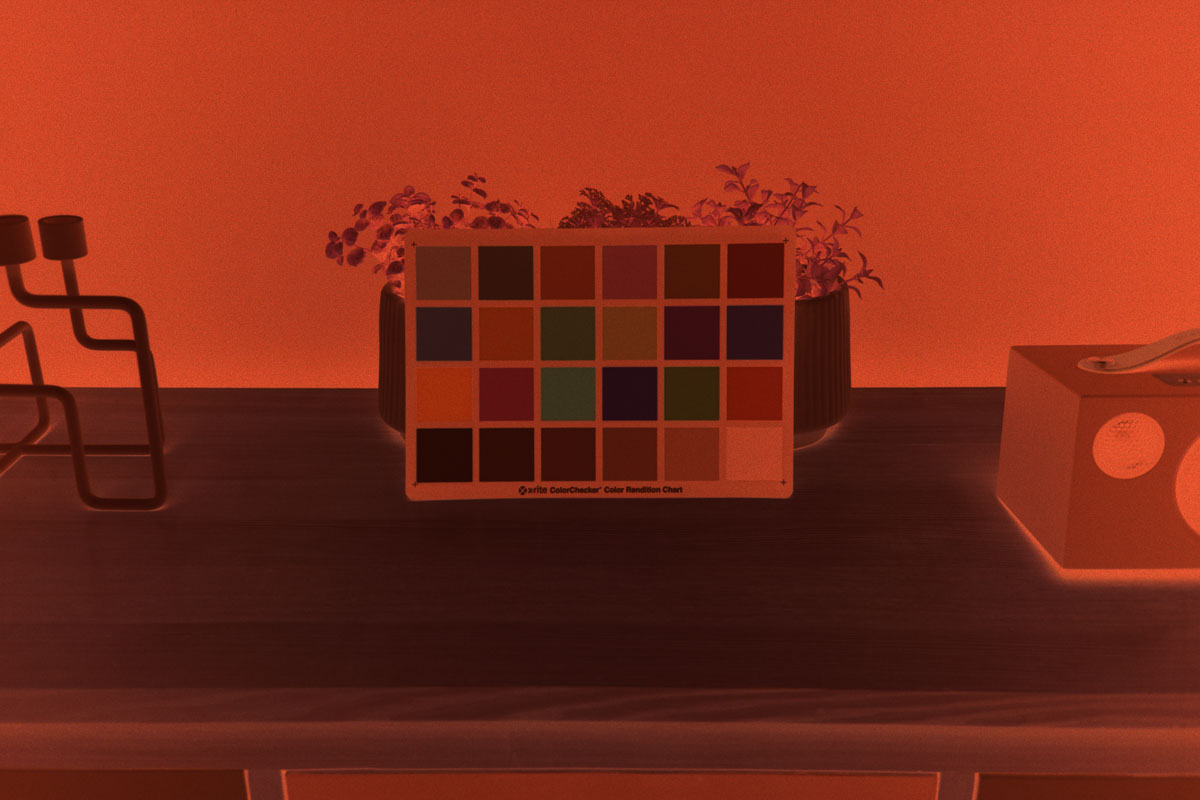
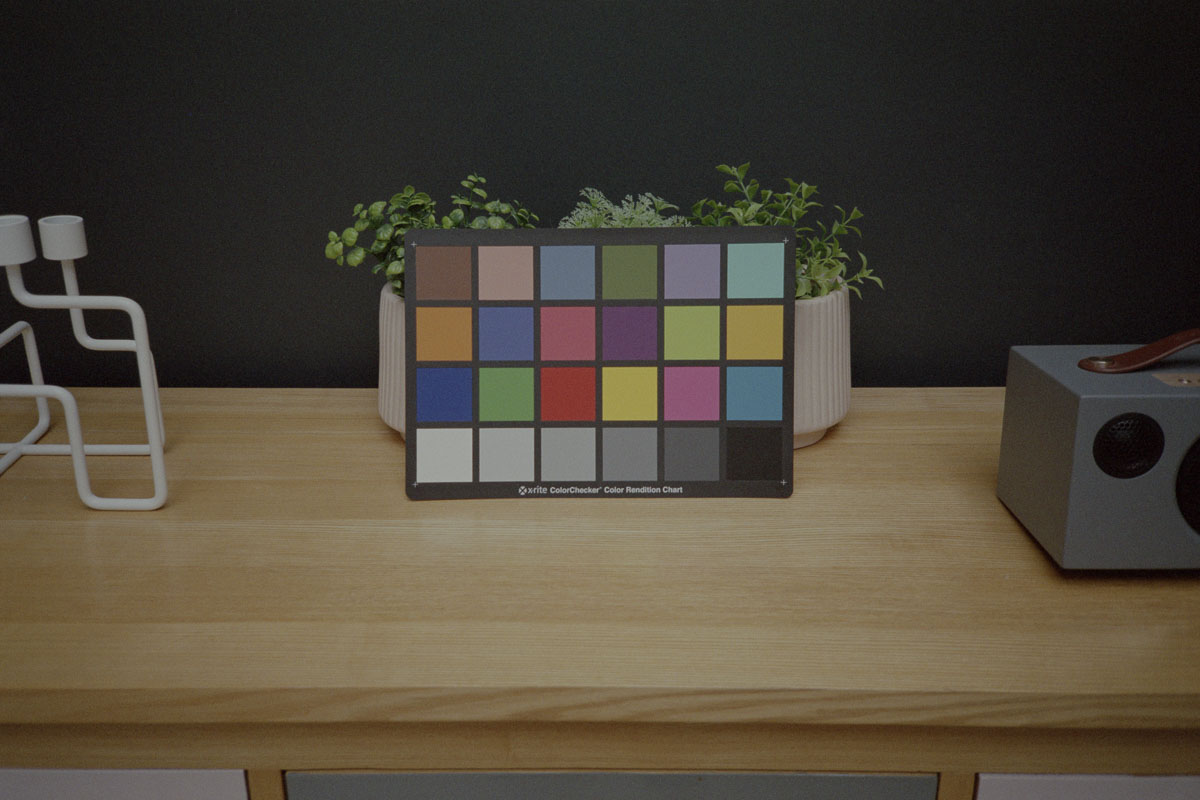
Scanning colour negatives is a delicate process. Unlike positives, negatives store an inverted representation of the original scene, and the film’s multiple dye layers create additional challenges. To accurately invert colour negatives, you can’t simply invert the RGB channels—doing so often produces a positive with a teal colour cast (see Figure 1), because the characteristic curves for each film layer are shifted relative to each other (i.e., vertically offset).

Variations in the development process can also affect the properties of a strip of negative film. Thus, to invert a scanned negative into a usable positive image, correction techniques are essential. In this post, I will explain these techniques and outline a workflow for inverting colour negatives in Photoshop, based on principles described in the research paper Scanning Colour Negatives.
🎞️ Understanding Colour Negative Film
Colour negative film is composed of three emulsion layers, each sensitive to one of the three primary colours:
- Red-sensitive layer → Cyan dye
- Green-sensitive layer → Magenta dye
- Blue-sensitive layer → Yellow dye
These layers work subtractively to form a cyan-magenta-yellow (CMY) negative. Furthermore, to compensate for unwanted light absorptions, colour negative films include a characteristic orange mask.
A film scanner or digital camera captures a colour negative as three separate curves (R, G, and B), each representing the transmitted light through the corresponding filter inside the capture device. These curves are S-shaped and shifted relative to each other, primarily due to the presence of the orange mask. We refer to the slope of each curve as its gamma value. Because each layer has a different gamma, simple RGB inversion produces colour errors.
To correct this, we must scale the density of each channel separately so that grey values remain neutral throughout the film’s exposure range.
🎯 Why It’s Tricky to Invert Colour Negatives to Digital
Trying to remove the orange mask from colour negative film at home? Firstly, it’s not as simple as inverting the image and adjusting levels. Moreover, colour negatives present unique challenges that Photoshop’s automatic tools can’t handle on their own, requiring a series of deliberate steps to achieve accurate colour and tonal balance. Here’s why:
| 🧪 Problem | 🔍 Why It Happens |
|---|---|
| Orange Tint | Colour negative film includes an orange mask that compensates for unwanted absorptions in the dye layers. While essential for analogue printing, it creates a colour cast in digital scans that you should remove. |
| Colour Casts | Each of the three film layers (red, green, blue) has a different gamma and characteristic curve. Simply inverting RGB channels doesn’t align them, often producing a teal cast. |
| Flatter Contrast | Scanned negatives often appear flat because most of their richness comes from the photographic paper used during printing. Without that paper response, digital scans can have compressed mid-tones and reduced dynamic range. |
| Film-to-Film Variability | Development inconsistencies mean the same workflow can produce slightly different results across strips or rolls of film. Manual adjustments are often needed. |
Understanding these challenges is the first step to a successful conversion. The workflow below addresses them systematically, producing a neutral, colour-accurate positive from your scanned negative.
Test Image Setup
For this guide, I photographed the X-Rite ColorChecker using a Contax G2 on Fuji Superia 200 and scanned the negative as a RAW linear TIFF file with a Minolta DiMAGE Scan Elite 5400 and VueScan.
📸 Step-by-Step Workflow to Invert Colour Negatives to Positives in Photoshop
Before diving into the detailed workflow, here’s a high-level summary of the key steps to invert colour negatives into positive images:
- White Balance the Film Base – Neutralises the unexposed area and removes the orange film mask.
- Assign a Linear (Gamma 1.0) Profile – Ensures pixel values accurately reflect light transmittance.
- Correct Channel Densities – Scales the red, green, and blue channels so greys stay neutral, and colours are accurate.
- Invert the Image – Inverts the negative into a positive with true-to-life colours.
- Apply Contrast – Refines tonal separation and enhances visual clarity.
1) White Balance the Film Base
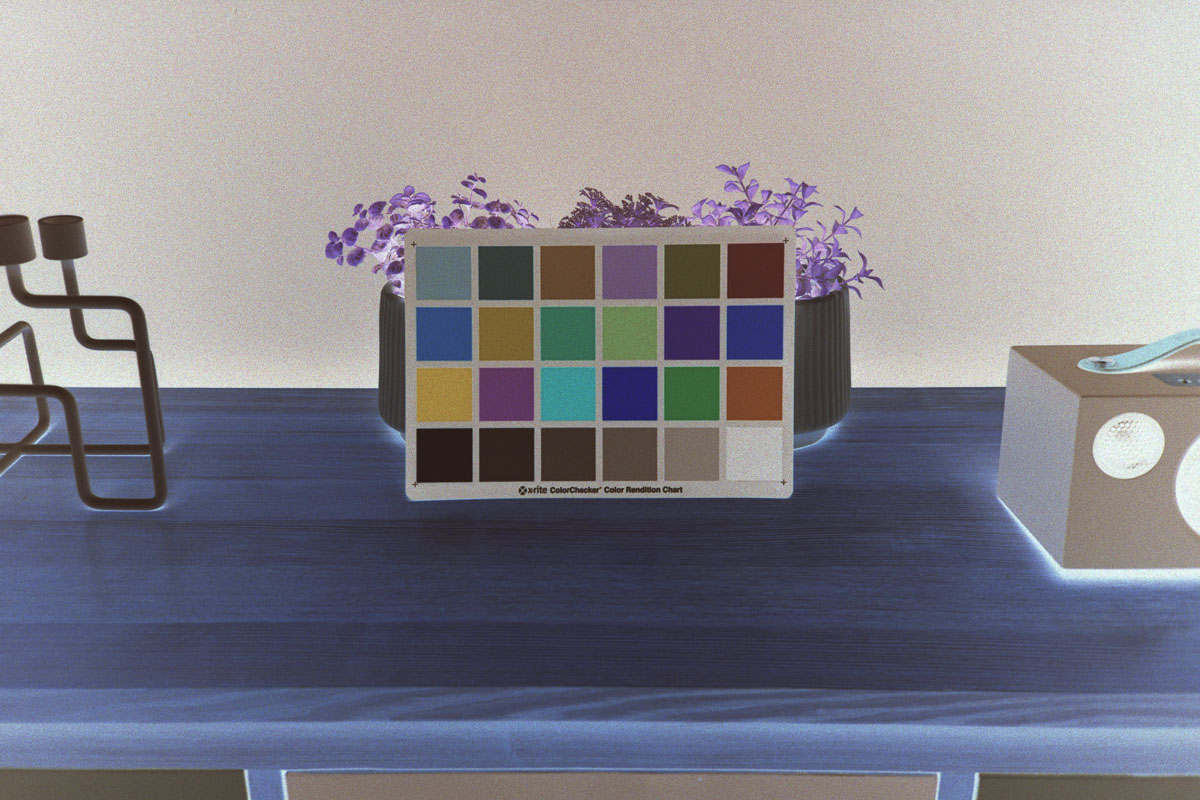
- Identify the unexposed part of the negative (usually the film border), or click on the brightest area of the negative that will become the darkest part of the scene when inverted (see Figure 2).
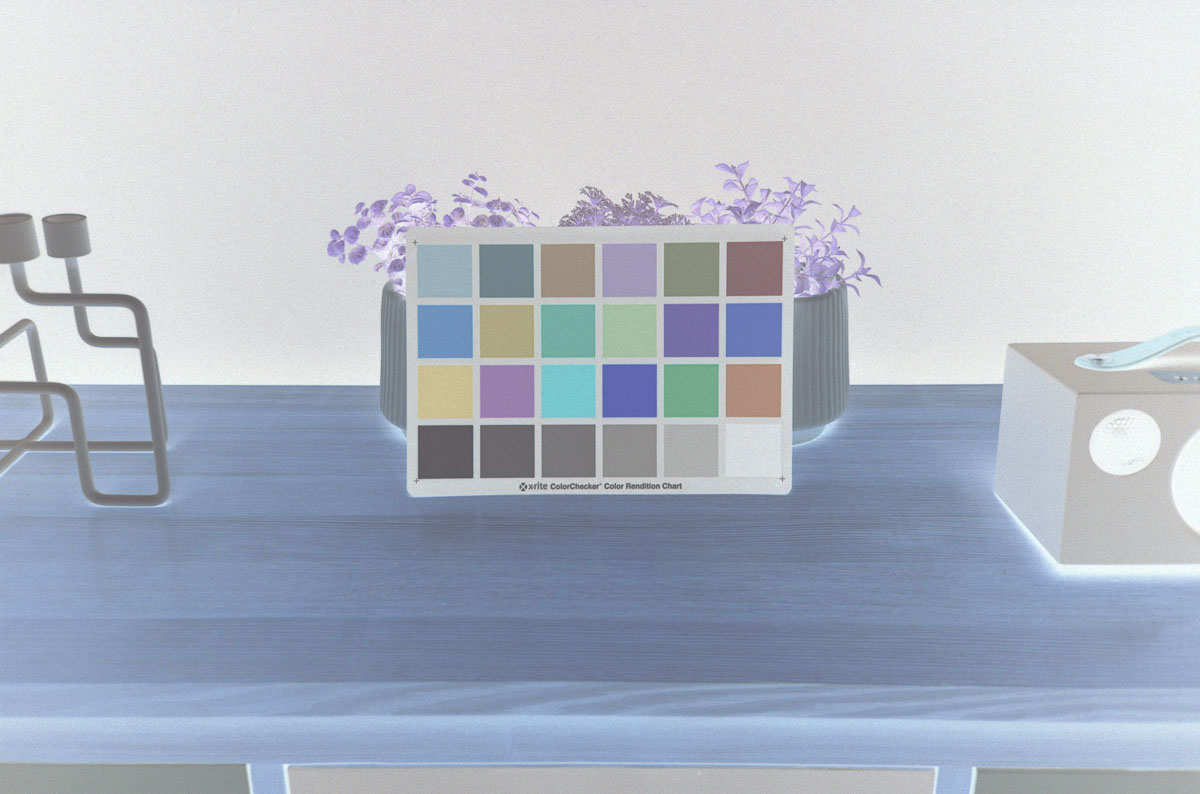
- Use Photoshop’s White Balance tool or Set White Point function to make this area neutral (i.e., black [see Figure 3]).
Why: This step provides a reference to scale the red, green, and blue channels correctly. Moreover, correctly white balancing the film base is a key part of removing the orange mask from colour negative film, ensuring that grey areas in the original scene will appear neutral after inversion.
2) Assign a Linear Profile
- Assign a linear gamma profile (Gamma 1.0, e.g., an Adobe RGB or sRGB Gamma 1.0 profile) to your scan using Edit → Assign Profile. You can download ready-to-use linear gamma profiles here: GitHub – elles_icc_profiles.
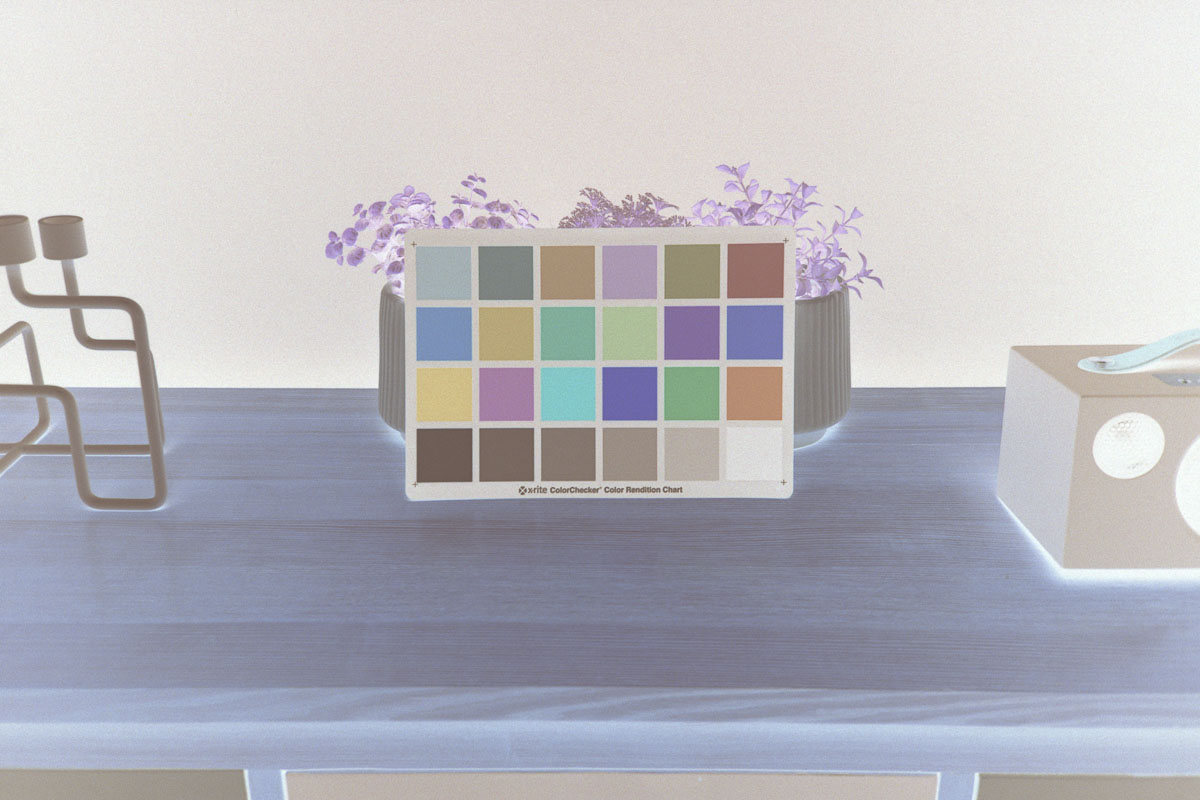
- Convert to the corresponding non-linear (Gamma 2.2) colour profile for your normal working space (e.g., Adobe RGB or sRGB) using Edit → Convert to Profile (see Figure 4).
Why: Linear colour profiles ensure pixel values are proportional to transmittance, preserving the densities captured by the camera or scanner. Therefore, this step is essential for accurate channel corrections, proper inversion, and removing the orange mask from colour negative film.
Note: I assign a linear sRGB profile because my monitor doesn’t support the Adobe RGB colour space, but my results still exceed those from some film labs. If your monitor supports it, you can use a linear Adobe RGB profile for a wider gamut.
3) Correct Channel Densities
- Use a Levels adjustment layer.
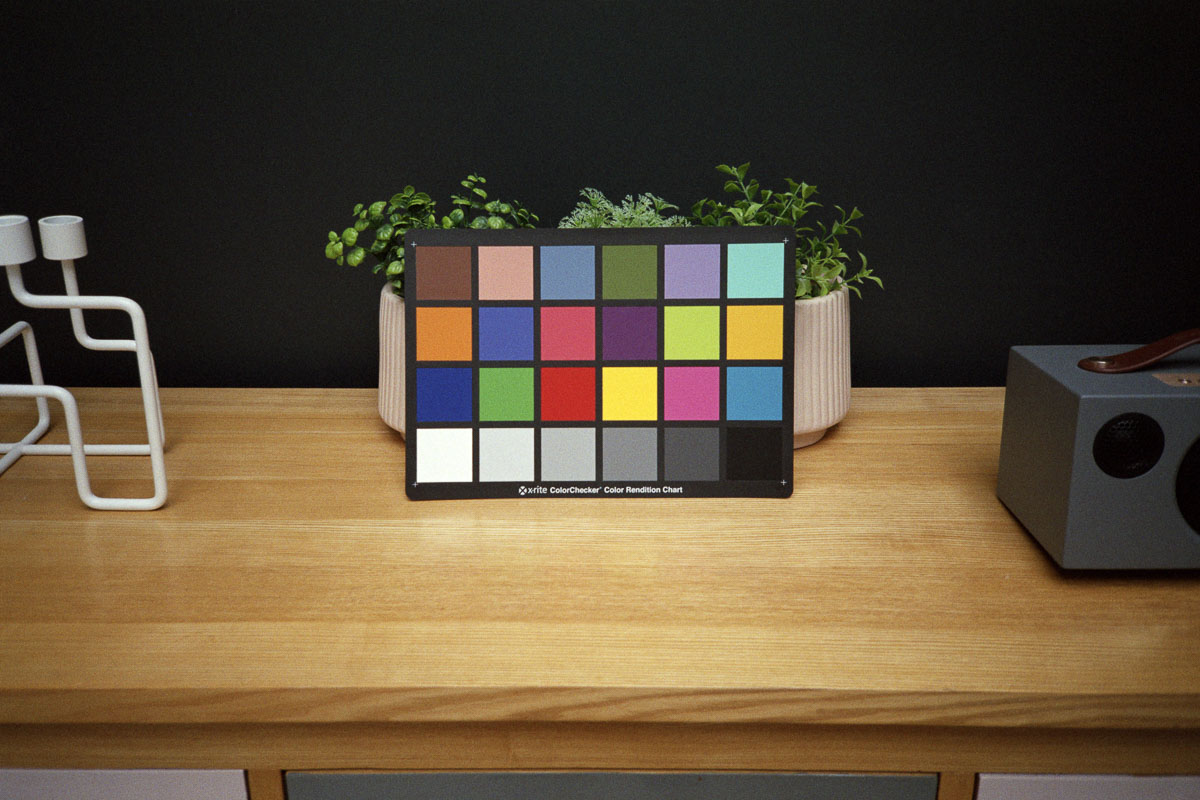
- Click on a neutral reference point (e.g., a mid-grey area) to scale the R, G, and B channels independently (see Figure 5).
Why: Each film layer has a different gamma and characteristic curve. Therefore, correcting the densities keeps grey areas neutral across the exposure range and reproduces colours accurately. This step effectively compensates for both the orange mask and the vertical offsets of the film’s characteristic curves.
4) Invert the Negative
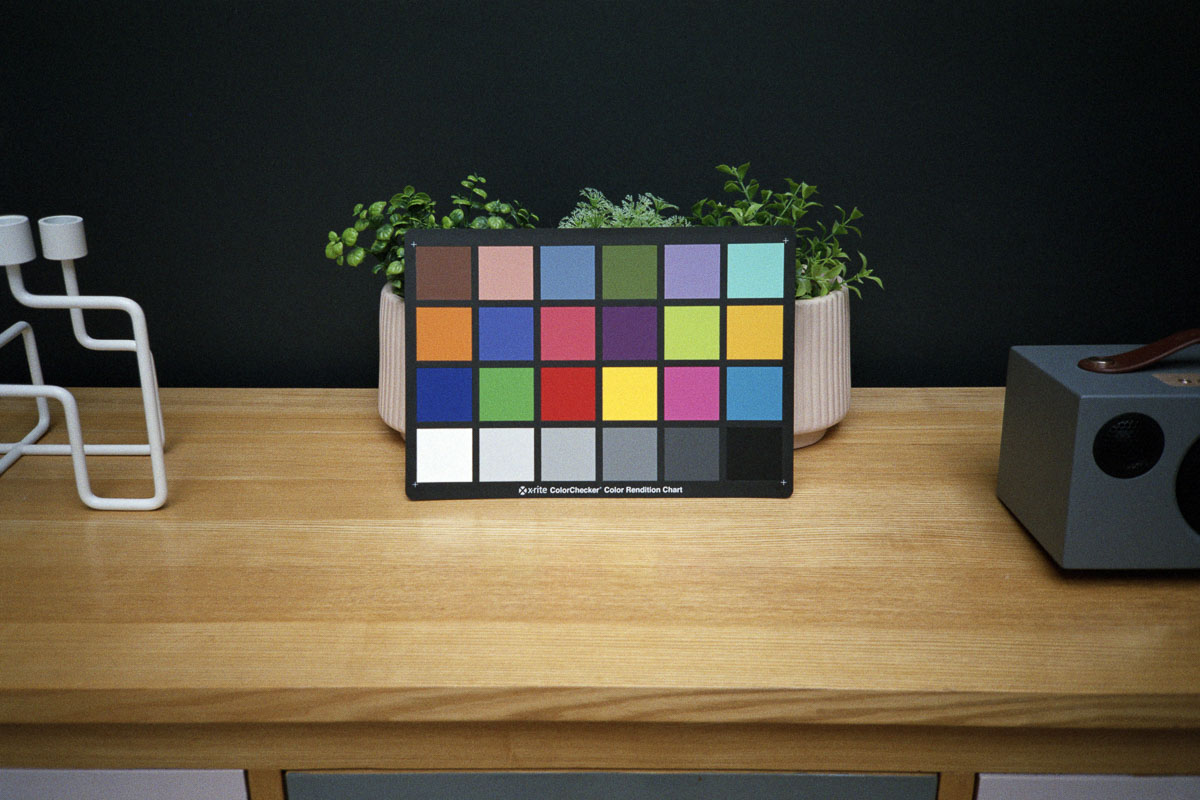
- Go to Image → Adjustments → Invert (see Figure 6).
Why: This step flips the negative into a positive image, turning dark areas light and vice versa. After density correction, this inversion produces a positive with accurate colours and balanced tonal values.
5) Apply Contrast
- First, use Auto Contrast to set white and black points, then fine-tune with a Curves adjustment.
- Next, adjust the midtone by dragging it down to around 100 (instead of the default 128), or tweak it as needed to suit your scan, to increase density and depth (see Figure 7).
Why: Even after inversion and density correction, negatives can look flat compared with prints. So, apply contrast to your scan to enhance its depth, tonal separation, and visual clarity.
When Manual Methods to Invert Colour Negatives Fall Short
However, the characteristics of one strip of developed colour negative film can differ noticeably from another—even within the same film stock. This issue means the detailed step-by-step method above won’t produce perfect results for every frame, and repeating it manually for each strip quickly becomes time-consuming.
⚡ A Faster Workflow to Invert Colour Negatives to Positives
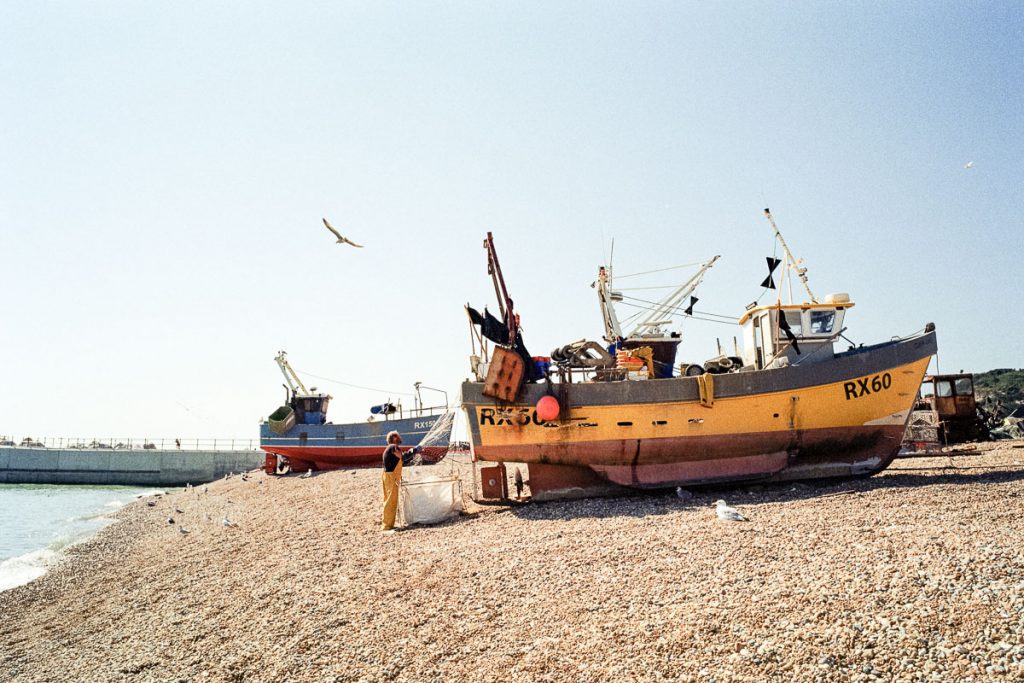
To speed things up, here’s a much quicker method that still produces high-quality, accurate colour (see Figure 8). Additionally, you can record these steps as a Photoshop action and run it on a batch of film scans, just like I do (apologies for the detour, but hopefully the workflow above was helpful!):
- Assign the linear profile
- Convert to the gamma 2.2 version of that profile
- Increase gamma further to 2.2 (to boost density) using the Exposure adjustment
- Apply Auto Tone to set the white and black points
- Invert
I made the photo below using the steps above, with no additional adjustments. Not bad, right?
Why This Easy Method Works
The key trick to invert colour negatives to positives is to assign a linear colour profile before removing the orange mask—either with Auto Tone (the quick & easy way) or by balancing the densities of each colour channel (the precise way). This crucial step lets Photoshop evaluate the negative without any baked-in gamma. Auto Tone/channel balancing then ensures greys remain neutral across the entire exposure range. After inversion, the result is a more natural, true-to-life image. You can also fine-tune the white balance later in Lightroom if needed.
✨ Optional: Add a Tone Curve to Mimic the Fuji Frontier Look
If you want your film scan to echo the look of a lab-processed Fuji Frontier print, you can apply a custom tone curve after completing the negative conversion (see Figure 9).
Go to:
Layer → New Adjustment Layer → Curves
Then shape your tone curve with the following input/output settings:
| Channel | Point | Input | Output |
|---|---|---|---|
| Red | Shadows | 52 | 49 |
| Midtones | 124 | 138 | |
| Highlights | 203 | 227 | |
| Green | Shadows | 53 | 52 |
| Midtones | 122 | 133 | |
| Highlights | 199 | 223 | |
| Blue | Shadows | 51 | 46 |
| Midtones | 120 | 125 | |
| Highlights | 200 | 222 |

📷 These settings help you recreate the classic mini-lab 35mm film aesthetic after inverting your colour negatives.
✅ How to Invert Colour Negatives: Key Concepts
- Colour negatives are subtractive (CMY) images formed on three separate layers.
- Each layer has a different gamma and curve; therefore, simple RGB inversion is not enough.
- White balancing, linear profile assignment, and channel-specific density correction are necessary to produce neutral greys and correct colours.
- Only after these corrections should you invert and apply contrast.
Following this workflow ensures your colour negatives are inverted into accurate, neutral, and visually pleasing positives, preserving the full tonal range and colour fidelity of the original scene.
🆚 Film Lab vs DIY: Side-by-Side Results
To show how closely this workflow can match professional lab output, here’s a comparison between a Fuji Frontier SP-3000 lab scan (left) and a Photoshop negative conversion using the workflow described above (right):


This side-by-side comparison highlights how careful linear processing, channel balancing, and optional tone-curve shaping can bring DIY scans remarkably close to the look of classic Frontier mini-lab results.
🔗 Want More?
If you found this guide on how to invert colour negatives in Photoshop helpful, you might also want to:
- 💬 Share it with your film photography group
- 📸 Explore more of my film photography work
Thanks for reading — and happy scanning! 🎞️🖼️